Two-Player Soccer Passing Drills: Accuracy and Movement
Soccer passing drills for two players can build accuracy, a useful first touch, and the habit of moving after a pass. Begin close together with gentle ground passes. A simple task that both partners can complete comfortably is more useful than long passes that turn every repetition into a chase.
The four drills below progress from passing through a wide gate to changing the receiving angle. They build on our beginner passing lesson and can be adapted for a parent and child, two beginners, or teammates working at different levels.
Start with a clear passing lane
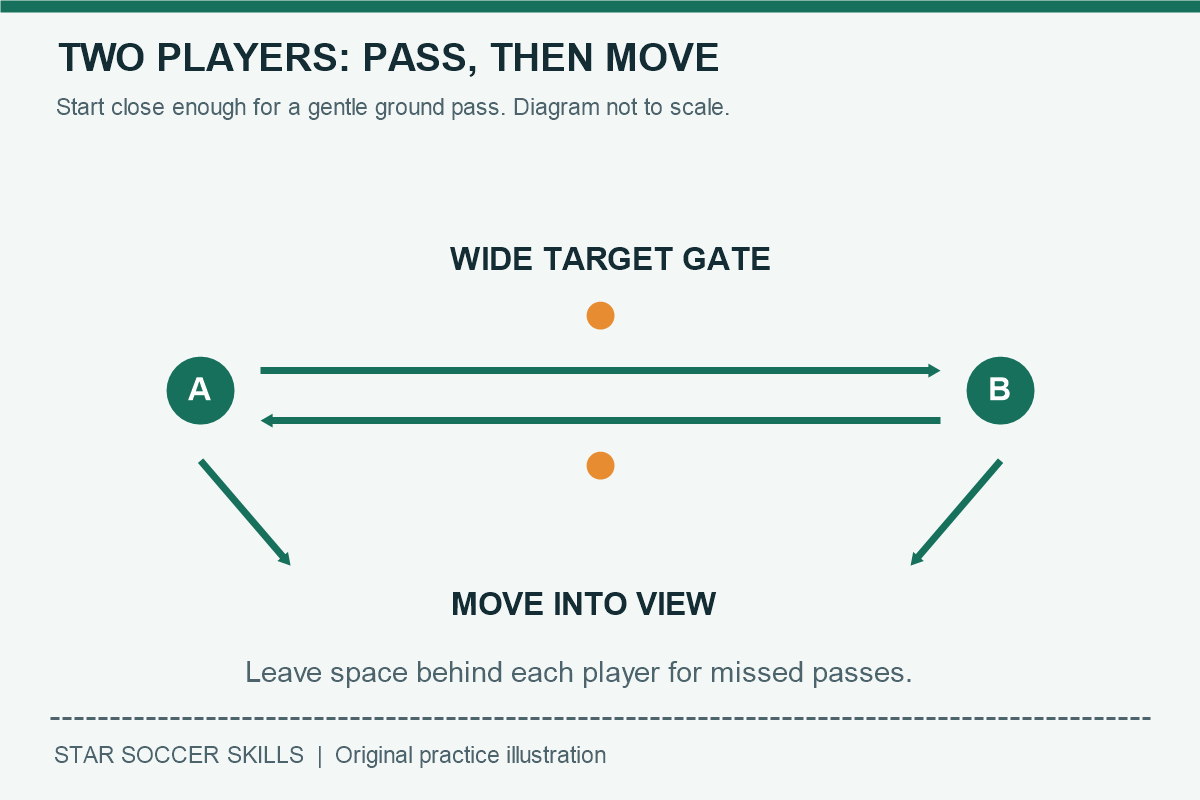
Choose flat, dry ground away from roads, glass, pedestrians, pets, and other activities. Leave space behind each player for a missed pass. Use an age-appropriate ball, suitable footwear, and flat non-slip markers. Children need appropriate adult supervision.
Begin roughly 3-5 yards apart. This is a suggested starting range, not a rule: shorten it until both players can pass along the ground without straining. Agree on a word such as “stop” so either partner can pause the drill immediately. Stop for pain, dizziness, or loss of safe footing.
Check the inside-foot pass first
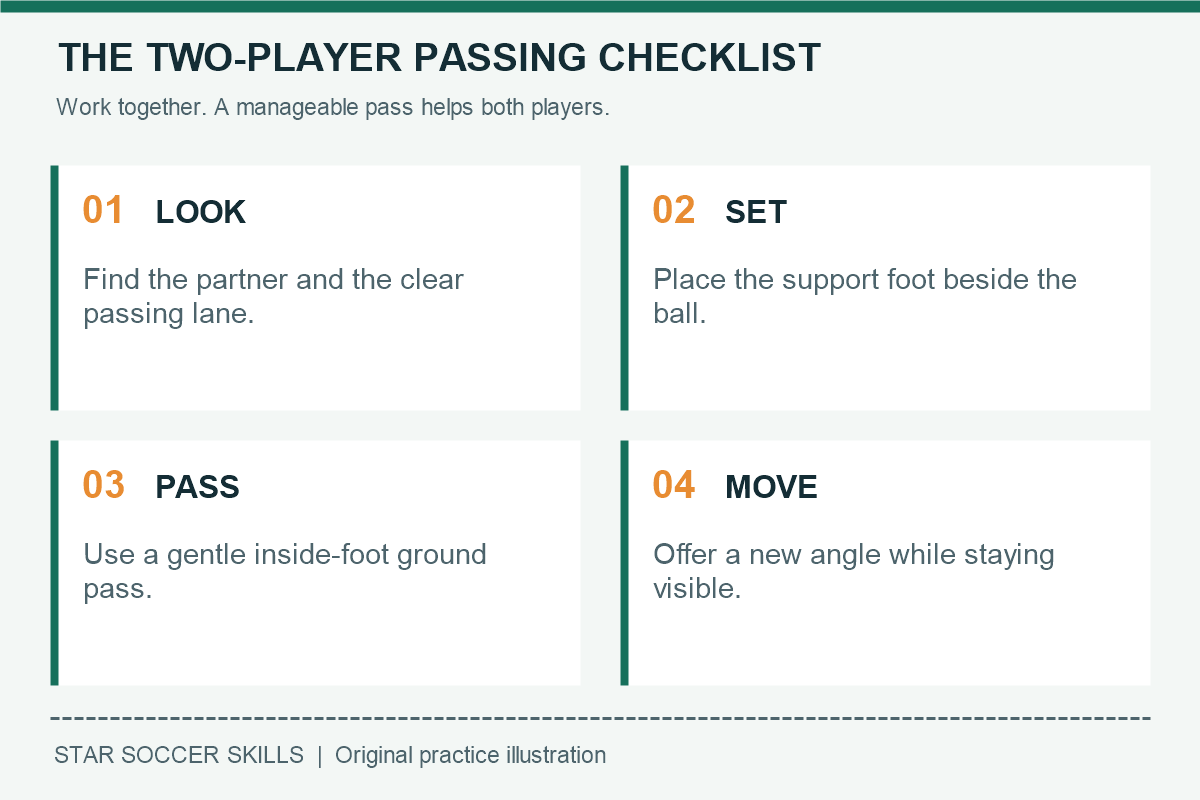
Look at the target, place the supporting foot beside the ball, and point it generally toward the intended pass. Turn the passing foot outward and contact the middle of the ball with the inside of the foot. Use a comfortable follow-through toward your partner rather than swinging for maximum power.
The receiver should adjust their feet as the ball approaches. A first touch into a useful position makes the return pass easier. If the ball keeps escaping, revisit the receiving and first-touch lesson and slow the incoming pass.
Four drills for a pair
| Drill | Main task | Easy adjustment |
|---|---|---|
| Pass through a gate | Send a ground pass between two markers | Widen the gate and move closer |
| Receive and return | Prepare the return with the first touch | Allow extra settling touches |
| Pass and move sideways | Offer a new receiving angle | Walk to one nearby marker |
| Choose the open gate | Look and select a clear target | Name the gate before starting |
1. Pass through a gate
Place two flat markers between you to make a wide gate. Pass along the ground through it, let your partner control the ball, then receive the return. Begin with a gate wide enough that success is realistic. A roughly yard-wide gate may be suitable, but change it to fit your distance and skill.
Take five passes each, then pause and discuss one thing that helped. The receiver should not stand rigidly and demand the ball reach an exact spot; a small adjustment of the feet is part of receiving.
Progression: alternate passing feet. Narrow the gate only after the current task feels comfortable, and do not increase distance at the same time. Cue: aim through the window, not at the marker.
2. Receive and return
Remove the gate if it distracts you. Player A passes to Player B, who cushions the ball into a comfortable position and returns it. Switch the focus after several repetitions so each player practices receiving deliberately.
Try two touches when ready: one to prepare and one to pass. If a beginner needs a third touch, allow it. Forcing a two-touch limit before the movement is manageable often creates rushed passes rather than better technique.
Progression: receive with one foot and pass with the other. Keep the incoming ball gentle. Cue: first touch prepares the pass.
3. Pass and move sideways
Give each partner two receiving markers a comfortable step or two apart. Pass to your partner, then walk toward your other marker while remaining visible. Your partner controls the ball, looks up, and passes to your new position.
Start slowly and avoid crossing each other’s passing lanes. Movement should create an easier angle, not make the next pass impossible. If you are both new, let one player move while the other stays in place, then swap roles.
Progression: choose your receiving marker before sending the pass back. Cue: pass, move, show. Learn why support angles matter in our teamwork lesson.
4. Choose the open gate
Make two wide target gates in the receiver’s area with clear space around them. The receiver names a gate and moves into a sensible position behind it before the passer plays the ball. The passer looks up and sends a comfortable ground pass through the chosen gate.
Initially, announce the target before the sequence starts. Later, the receiver can choose while the passer controls the previous ball, provided there is still enough time to look and pass safely. Swap roles regularly.
Progression: vary the receiving angle without adding power. This introduces a simple choice, but it does not reproduce a defender closing a passing lane. Move into suitable small-sided games when you can practice with a group.
An 18-minute partner session
Use two minutes for easy movement and short passes. Spend three minutes on the gate, one minute resting, three minutes receiving and returning, one minute resting, three minutes passing and moving, and three minutes choosing a gate. Finish with two easy minutes and a shared practice note. Shorten or skip activities to suit the players.
Video: passing, receiving, and movement
England Football Learning’s Pass And Move, with Ryan Davies, provides an external coaching example of receiving and movement. It is a group coaching session rather than this exact two-player plan. Use it to observe the principles, and keep the simpler pair setup described above.
Keep a shared accuracy record
Try ten comfortable passes each through the same gate. Count those that reach the partner through the gate at a manageable speed. Record the distance, gate width, and foot used. This is a cooperative practice record, not a standardized rating or a competition between partners.
If one player is more experienced, they can use their less comfortable foot while the beginner has a wider receiving target. Do not compensate for a skill gap by passing harder. Change one variable at a time and preserve useful repetitions for both players.
Frequently asked questions
How far apart should beginners stand?
Start close enough for a gentle ground pass, often about 3-5 yards, and adapt from there. Age, ball size, surface, and ability matter more than keeping a fixed distance.
Are one-touch passes necessary?
No. Begin with time to control and look up. One-touch work is a later option when both players can deliver and receive a predictable pass comfortably.
Can an adult practice these drills with a child?
Yes, if the area and activity suit the child. The adult should control pass speed, allow extra time, and focus on encouragement rather than a score target.
Continue through our step-by-step soccer course. For broader youth coaching context, see the FIFA Training Centre grassroots resources. This article’s drills and timings are original adaptable practice suggestions.
Related home practice guides
- First-Touch Drills at Home: Wall and Partner Options
- Soccer Drills at Home Alone: A Beginner Practice Routine
[…] Two-Player Soccer Passing Drills: Accuracy and Movement […]